App Sideloading Guide: How To Get Video Streaming NOW!, on GM EVs!
Share
Coming from a Tesla & Rivian world the app selection in the Silverado EV was barren. In my search for a way to install video apps (for road trips) I stumbled across a way to side-load apps onto my Silverado EV infotainment system. This procedure may or may not work on other GM vehicles. It is also confirmed to work on the Equinox EV as well.
Silverado EV Matte Screen Protectors are available here.
This guide will show you how to side-load apps onto your GM EV infotainment system. This was done on a 2024 Chevy Silverado EV RST but should also work on other 2024+ GM EVs.
Note: the architecture may be different on newer vehicles so you may need to compile for arm instead of x86_64 for example. You should know which architecture your vehicle is running before you continue. Ours is x86_64 Itel Atom based so that is what this guide will be built on.
DISCLAIMER/WARNING: This post is for educational purposes only. If you choose to do this you assume all responsibility for anything that may or may not happen as a result! Your vehicle warranty could be affected and/or it may break your infotainment requiring recovery/replacement. Do not do this unless you know what you're doing. If you choose to do this, know that you do so at your own risk!
The Machine Requirements:
Windows 10/11 with Android Studio installed
You should have at least 32 gb RAM & 100 gb of available disk space on the system to perform these steps. Less may be required but this is an amount I am 100% sure will be sufficient.
Git for windows installed
Build & Publish Amaze File Manager To Play Store (For Internal Testing)
Install Java (JDK 17)
Download: https://www.oracle.com/java/technologies/javase/jdk17-archive-downloads.html
After install:
Open Command Prompt running it as an administrator
Run the following commands:
setx JAVA_HOME "C:\Program Files\Java\jdk-17"
setx PATH "%JAVA_HOME%\bin;%PATH%"
Verify Successful Install:
java -version
Close Command Prompt
Install Android Studio
Download & install:
https://developer.android.com/studio
Android Studio includes:
- SDK tools
- Emulator
- Gradle
- ADB
- UI editor
Clone the Project
Open Windows Command Prompt As Administrator
Make sure your in the directory where you want to clone/download the project
Run these commands:
git clone https://github.com/TeamAmaze/AmazeFileManager.git
cd AmazeFileManager
PART 2: Open in Android Studio & Configure
1. Open the AmazeFileManager folder in Android Studio.
2. Let Android Studio download required SDKs and Gradle components.
3. Change the application ID (package name):
Open app/build.gradle & Modify this line:
applicationId "com.example.amazetest" (Replace whats in quotes with your unique ID)
Modify AndroidManifest.xml to include:
<uses-feature android:name="android.hardware.type.automotive" />
<meta-data android:name="android.automotive" android:resource="@xml/automotive_app_desc" />
PART 3: Create and Use a Signing Key
1. Open Android Studio > Build > Generate Signed Bundle/APK
Choose:
Android App Bundle (AAB) (preferred for Google Play)
2. Create a new keystore (if you don’t have one)
Save the .jks file somewhere safe and remember the:
Key alias & Passwords
PART 4: Build the Signed App
After configuring the keystore, Android Studio will build:
app-release.aab — for uploading to Google Play
or app-release.apk — for sideloading
Output Will go to these locations:
AAB: app/build/outputs/bundle/release/app-release.aab
APK: app/build/outputs/apk/release/app-release.apk
PART 5: Publish to Google Play
- Go to https://play.google.com/console (You must Sign up and pay $25 one-time fee)
- Create new app → fill name, language, and category
- Upload your .aab file under Production > Create Release
- Submit for review
Note: Use Internal Testing Track (via email or link)
Install on your vehicle via Google Play store via a web browser by selecting “GM Vehicle”
PART 6: Download APK files for the apps you wish to side load
https://apkcombo.com/downloader/
Format a USB-C memory stick that’s 32GB or less as FAT32 and save the apk files to the USB device.
NOTE: I was not able to load XAPK files (Split APK) and was not able to use 3rd party tools to convert them to apk so only apps available as a flat APK file will be able to be side loaded (At least on the Silverado EV I tested on).
PART 7: Side Load the apk files onto your vehicle
- Open Amaze File Manager
- Make sure your USB-C thumb drive is connected
- Tap + to create a folder and type in anything (one letter or number will do)
- Next you will be prompted to provide permissions and from there you will tap on open
- Now your into the internal file manager of the system
- Tap on the 3 lines menu in the top left of the screen and select your thumb drive and the folder where you saved the apk files
- Select the app apk file you wish to install by tapping the icon in the upper right corner of the file
NOTE: To remove an app from the system later on you tap and hold it from the home screen and then tap the X to remove the app.
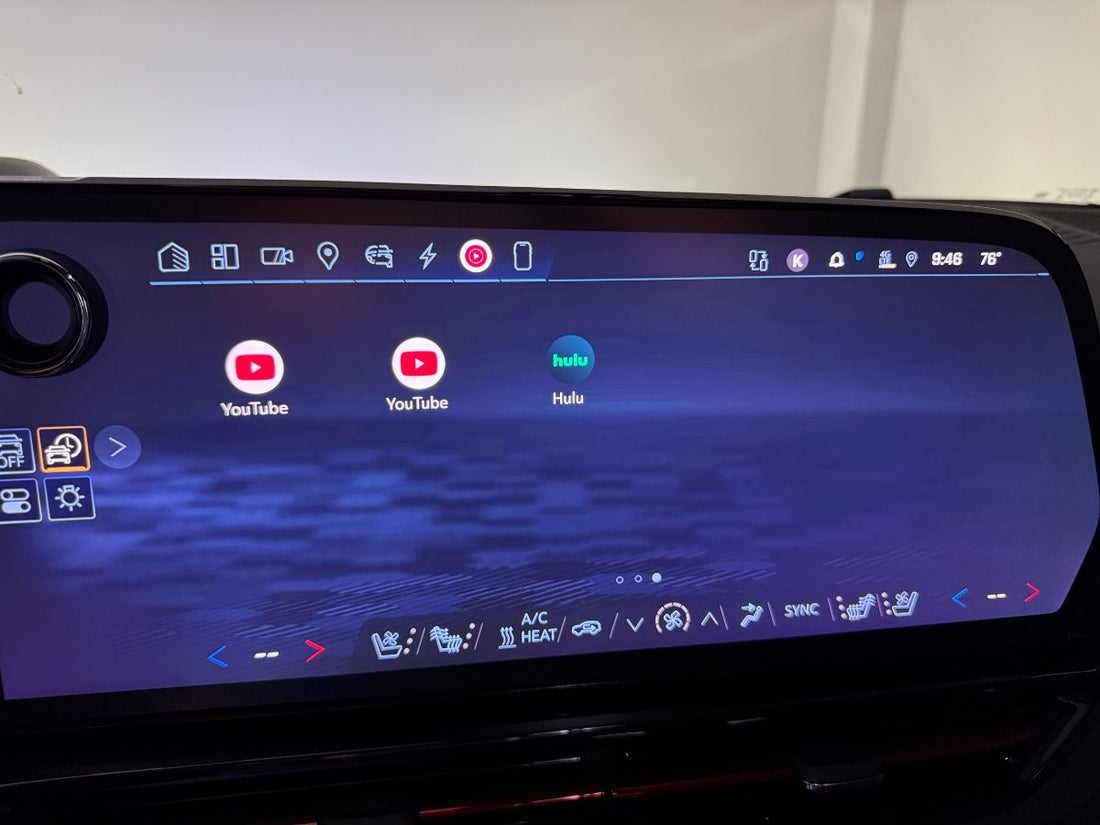
Finally Some Photos Of What we have accomplished


If this helped you, please considering buying me a coffee. Did I get something wrong? Let me know in the comments section or visit our Link Tree to contact us
Also, consider visiting our Silverado EV Accessories store to support us.
